Scenario Creation
YAML File
The YAML file contains scenario settings from the Carla side, i.e., information and settings for vehicles and RSUs generated by it.
In the opencda/opencda/scenario_testing/config_yaml directory, create a <scenario_name>.yaml file. These files are usually standard and can be copied and modified from an existing one. For more details on YAML configuration, refer to: https://opencda-documentation.readthedocs.io/en/latest/md_files/yaml_define.html
To connect SUMO to a scenario, you must add the following block to the YAML file and provide the relevant SUMO configuration files:
sumo:
    port: 3000
    host: sumo
    gui: true
    client_order: 2
    step_length: ${world.fixed_delta_seconds}
Assets
All SUMO-related files are stored in the sumo/assets/ directory. Create a subdirectory named <scenario_name> and add the following files:
<scenario_name>.sumocfg
The main SUMO config file, which references the other configuration files such as .rou.xml, .net.xml, etc.
<scenario_name>.rou.xml
This file defines vehicle routes. Use flow to define traffic flow and trip to define the path of a single vehicle. More information: https://sumo.dlr.de/docs/Definition_of_Vehicles%2C_Vehicle_Types%2C_and_Routes.html You can also use a Python script to generate random trips: https://sumo.dlr.de/docs/Tools/Trip.html The from and to fields are road segment IDs, which can be obtained by opening the .net.xml file in SUMO and right-clicking on a segment.
Important: If the scenario uses SUMO, there must always be at least one vehicle or flow active; otherwise, the simulation ends immediately. To prevent early termination, you can add a dummy stationary vehicle like this (replace edges and lane with actual values):
<vehicle id="stopped_car" type="vType_0" depart="0">
    <route edges="27 26"/>
    <stop lane="27_3" startPos="0" endPos="5" duration="100000"/>
</vehicle>
<scenario_name>.net.xml
This file describes the road network in SUMO format. It must be generated for each map. If the map already exists in another scenario, you can copy it. Otherwise, generate it as described in the section below.
CAPI Support Files
If the scenario uses Artery, you need to create one required and one optional file:
<scenario_name>_artery.sumocfg
Similar to the standard .sumocfg but with num-clients = 2.
<scenario_name>.poly.xml
Optional file. It describes various zones like buildings or trees that might affect signal propagation. Used by Artery for accurate communication modeling. For Town06, use the existing example; otherwise, create manually using netedit.
Artery
Artery configuration is stored in the artery/scenarios/ directory. Create a subfolder named <scenario_name>.
Files in this folder are the same as for SUMO: <scenario_name>.net.xml, <scenario_name>.poly.xml, <scenario_name>.rou.xml, <scenario_name>.sumocfg (Artery version)
You also need the following additional files:
omnetpp.ini
Standard config file. Change only the line *.traci.launcher.sumocfg = “<sumoconfig_name>.sumocfg”:
[General]
network = artery.inet.World
scheduler-class = artery::AsioScheduler

**.scalar-recording = false
**.vector-recording = false

*.traci.core.version = -1
*.traci.launcher.typename = "PosixLauncher"
*.traci.launcher.sumocfg = "<sumoconfig_name>.sumocfg"
*.traci.launcher.sumo = "sumo-gui"
*.traci.launcher.port = 8813

*.node[*].wlan[*].typename = "VanetNic"
*.node[*].wlan[*].radio.channelNumber = 180
*.node[*].wlan[*].radio.carrierFrequency = 5.9 GHz
*.node[*].wlan[*].radio.transmitter.power = 200 mW

*.node[*].middleware.updateInterval = 0.1s
*.node[*].middleware.datetime = "2013-06-01 12:35:00"

*.node[*].middleware.services = xmldoc("services.xml")

[Config separated-sumo]
*.traci.launcher.typename = "ConnectLauncher"
*.traci.launcher.hostname = "sumo"
*.traci.launcher.port = 3000
*.traci.launcher.clientId = 1
services.xml
Standard for all scenarios. Copy from rsu_check.
artery/scenarios/CMakeLists.txt
To enable scenario execution, add it to CMakeLists.txt. Just change the scenario name:
add_opp_run(<scenario_name> WORKING_DIRECTORY ${CMAKE_CURRENT_SOURCE_DIR}/<scenario_name> NED_FOLDERS ${CMAKE_SOURCE_DIR}/src/cavise)
How to Get Coordinates for YAML Files
After launching Carla using cd /carla && ./CarlaUE4.sh &disown, change the map to the desired one:
/home/carla/PythonAPI/util/config.py --map Town06
OpenCDA provides two scripts: get_position.py and set_position.py, located in opencda/opencda/scenario_testing/utils. Keep the z-coordinate as 1.05. Leave the 4th and 6th parameters as 0.
get_position.py
Outputs the current spectator position. Change port to match Carla’s configuration.
import carla
import random

client = carla.Client('carla', 2000)
world = client.get_world()

spectator = world.get_spectator()
location = spectator.get_transform().location
rotation = spectator.get_transform().rotation
print(f'Location: {location.x:.2f}, {location.y:.2f}, {location.z:.2f},')
print(f'Rotation: {rotation.pitch:.2f}, {rotation.yaw:.2f}, {rotation.roll:.2f}')
set_position.py
Used to place the spectator at a specified coordinate:
import carla
import random

client = carla.Client('carla', 2000)
world = client.get_world()

spectator = world.get_spectator()

x, y, z = map(float, input().split(","))
location = carla.Location(x=x, y=y, z=z)
rotation = carla.Rotation(pitch=0, yaw=-180, roll=0)
spectator.set_transform(carla.Transform(location, rotation))
Generating .net.xml for Carla Maps
Problem: Only Town06 has fully working .net.xml in the current project.
Solution: Carla provides a script to generate .net.xml from .xodr maps (official guide: https://carla.readthedocs.io/en/latest/adv_sumo/#create-the-sumo-net)
In the Carla container, .xodr map files are located in: CarlaUE4/Content/Carla/Maps/OpenDrive/
Install dependencies and define the SUMO_HOME environment variable:
carla@ed06e934540b:~$ pip install eclipse-sumo lxml
carla@ed06e934540b:~$ pip show eclipse-sumo
Name: eclipse-sumo
Version: 1.22.0
Summary: A microscopic, multi-modal traffic simulation package
Home-page: https://sumo.dlr.de/
Author: DLR and contributors
Author-email: sumo@dlr.de
License: EPL-2.0
Location: /home/carla/.pyenv/versions/3.10.11/lib/python3.10/site-packages
Requires:
Required-by:
carla@ed06e934540b:~$ export SUMO_HOME=/home/carla/.pyenv/versions/3.10.11/lib/python3.10/site-packages/sumo/
Then run the script at: Co-Simulation/Sumo/util/netconvert_carla.py
python Co-Simulation/Sumo/util/netconvert_carla.py CarlaUE4/Content/Carla/Maps/OpenDrive/Town04.xodr --output mounted/Town04_1.net.xml
Creating .poly.xml
Start by creating a template file and referencing it in the .sumoconfig using the line <additional-files value=”scenario_name.poly.xml”/>:
<additional xmlns:xsi="http://www.w3.org/2001/XMLSchema-instance" xsi:noNamespaceSchemaLocation="http://sumo.dlr.de/xsd/additional_file.xsd">
</additional>
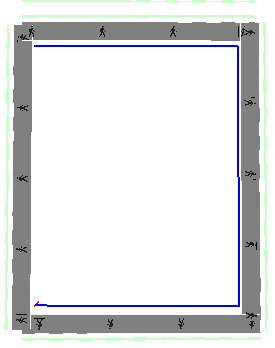
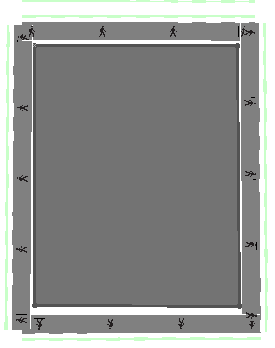
Then, open the scenario in netedit (Ctrl+M or File → Load sumo config) and switch to Polygon Mode.

In the settings, enable fill and Close shape, and optionally set ID, color, and type.
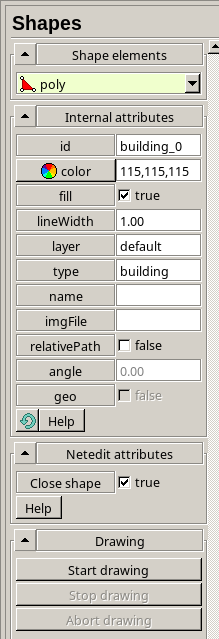
Click Enter to start drawing the polygon. Mark the desired area on the map and press Enter again to stop. Repeat for all necessary zones and save the file.